How to activate the Tavola integration with Last.app
Follow these simple steps to connect your Last.app POS with Tavola and automate your restaurant management.
Synchronizing your **Last.app** POS with Tavola is the definitive step to having total control of your restaurant. With this integration, your POS sales automatically sync with Tavola, allowing you to calculate theoretical costs, update your inventory in real time, and forecast demand effortlessly. In this article, we explain step by step how to activate this integration. Before starting the integration, make sure you meet these requirements: 1. Have an active account in **Tavola** subscribed to the **Elite Plan**. 2. Have an active account in **Last.app**. The first step is to obtain the unique identifier (token) for your restaurant. 1. Log in to Tavola and go to [**Settings → Integrations**](https://site.tavola.app/settings/integrations). 2. Copy your **Integration Token** from that page. 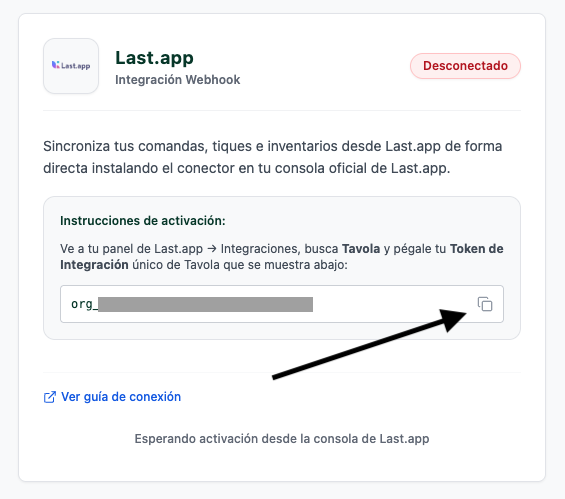 Once you have copied the token from Tavola, you need to enter it into your Last.app account. 1. Access your **Last.app** administration console. 2. Go to the **Integrations** section. 3. Use the search bar to find **Tavola**. 4. Click on the **Install** button. 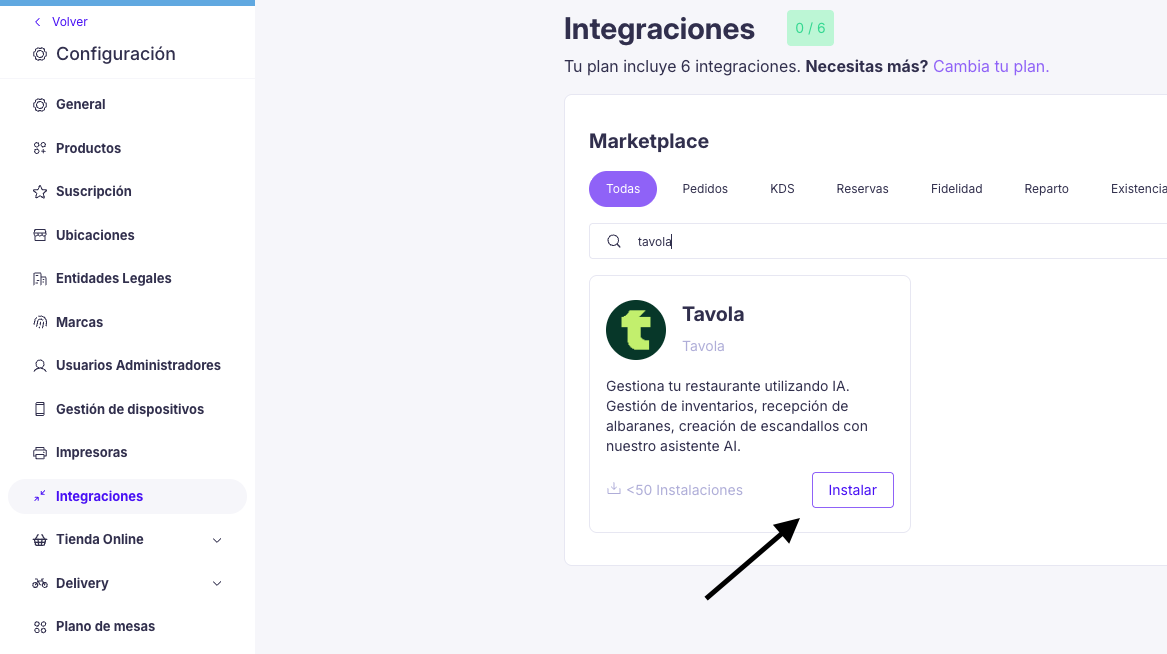 When installing the integration, you will be asked for two simple pieces of information: * **Integration Name**: Enter `Tavola Integration`. * **Integration Token**: Paste the token you copied from Tavola here. 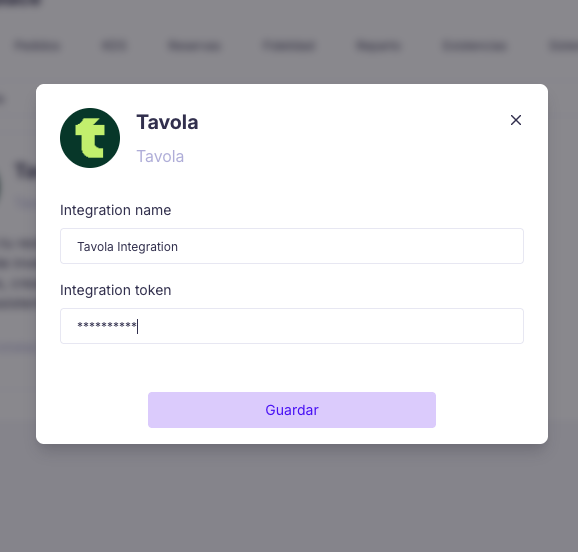 And that's it! Save the changes and the connection between Last.app and Tavola will start working automatically. From this moment on, your sales and cash register data will be synchronized, allowing you to make better decisions and save hours of manual work. If you have any questions during the process, do not hesitate to contact us at **[email protected]**.